
As a Windows user, you should know that when windows 8 update came to the windows modules installer worker changed its service from auto start to demand start. Since then, the changes were carried forward to Windows 10, which provides a useful service to windows update. But now there is some issue found in Windows 10 where Windows Modules Installer Worker uses the process of system CPU highly.
This issue is not a big deal to solve, but due to the heavy engineer system get slow, people panic and think about the dangerous malware that attacked their windows PC. The real thing is that you can fix this issue as our other windows users did with the perfect method for their Windows 10 given at the below guides. But first, there is a brief description of “what is Windows Modules Installer Worker?” which is important for you to know before you go with the solution method.
Windows Modules Installer Worker is not a magic that your windows system get notification of regular update every six months. Recently the latest windows 10 update version was released in May 2019. The service behind this windows system is “Windows Modules Installer Worker,” and it does not only notify the latest update for your windows but also installed them into your computer system. Even if you are checking for any update for your Windows, then service starts running automatically at the backend of your system. So deleting this service from your system is not a good idea. In this way, we provide you the best way to fix any high usage process issue caused by Windows Modules Installer Worker service.
How To Fix High Usage CPU Cause By Windows Modules Installer Worker (Stop & Disable)
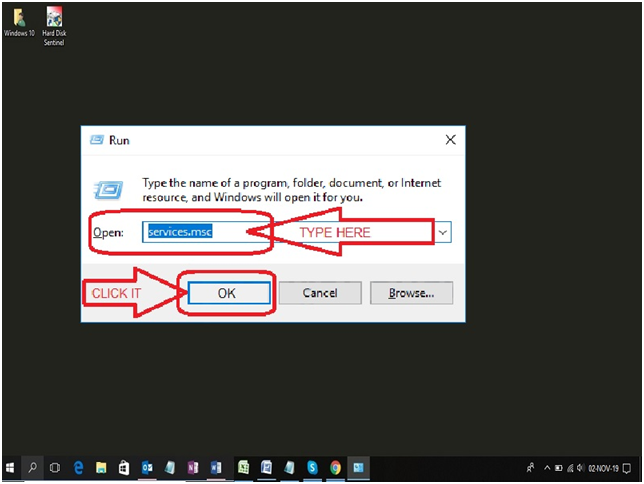
Step #1. In this method, we will disable and stop the Windows Update service for that you need to open run program from your Windows 10. (Press Windows + R key from the same keyboard time) And Type “services.msc” to the provided field and click on the “OK” button.
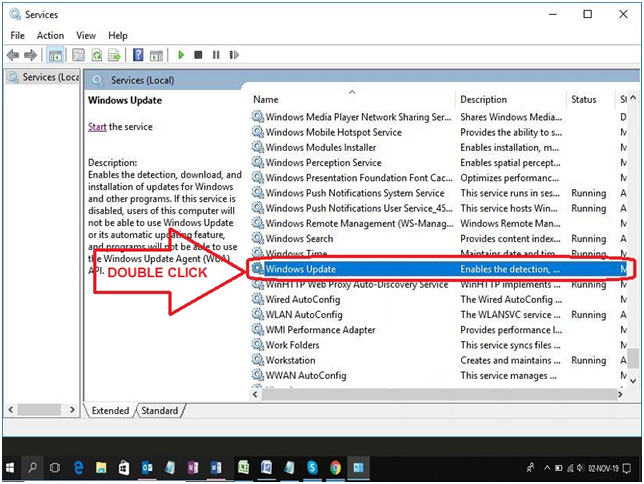
Step #2. MSC services setting windows will appear on the screen, as you can see in the screenshot. Look for “Windows Updates” and double click on it using a mouse.
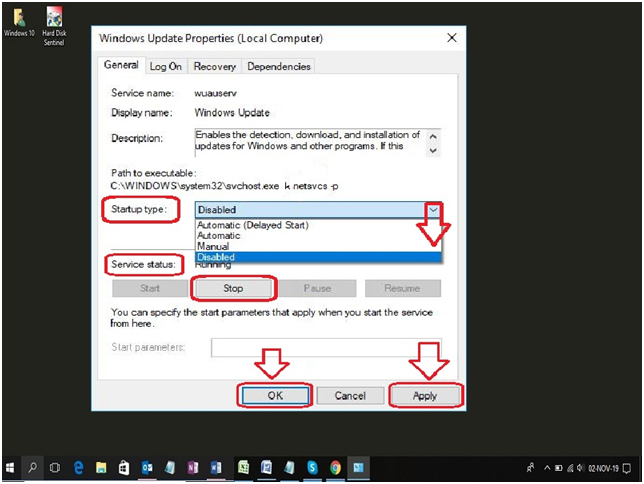
Step #3. Change the startup type to “Disabled” and in-service status click on the “Stop” button. To confirm your changes, click on the “Apply” button then “OK” button.
Now you can check that you’re High Usage of CPU is normal after applying the above steps. If any case you get trouble with this method, then you can go with another method mention below.
How To Fix High Usage CPU Cause By Windows Modules Installer Worker (Change Internet Setting)
Step #1. In this method, you need to change the internet measure by means of a meter connection, for that you need to confirm that which type of internet method you are using Wireless (Wi-Fi Network) or wired (Ethernet Network).
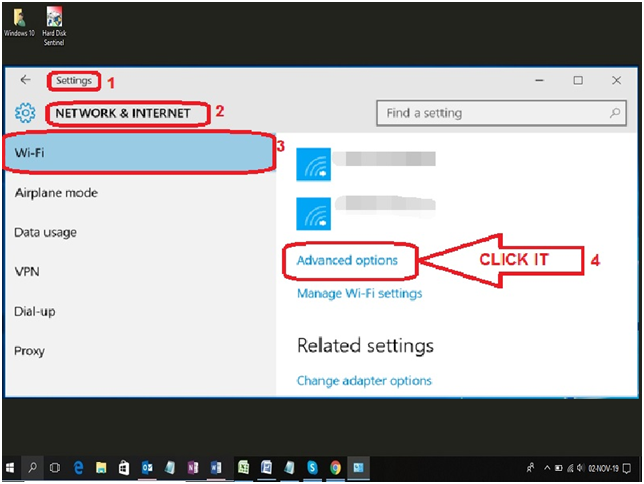
Step #2. If you are using a Wireless method, then open the “Network & Internet” setting follow by click on start > settings > network & internet. Click on Wi-Fi and then “Advanced Options,” as you can see in the screenshot as an example.
Step #3. In the advanced Wi-Fi setting, turn on “Set as metered connection” by switch the button to the right.
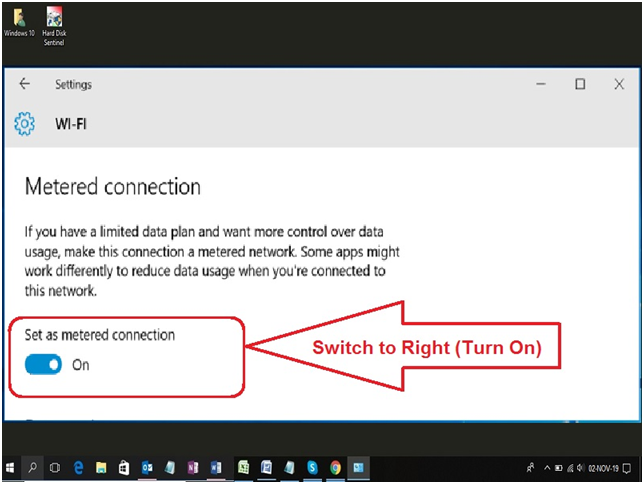
In this way, you can fix the windows modules installer worker high CPU issue on windows 10 by little change is Wi-Fi Internet setting. If you are using the wired internet method, then go with step #4.
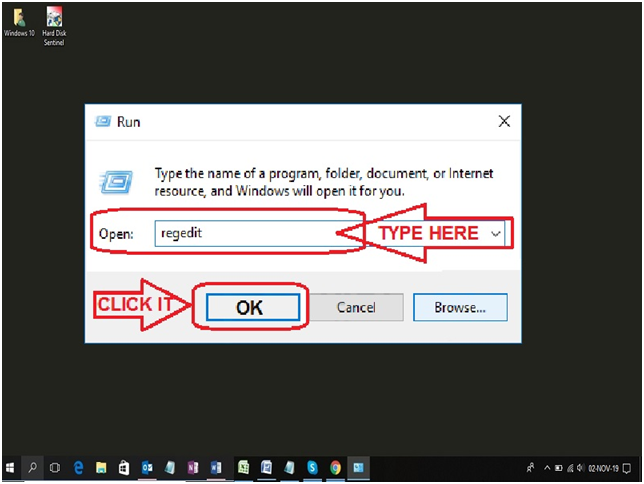
Step #4. If you are using an Ethernet network, then press “Windows + R key” uses the keyboard to open the RUN program. Here you need to type “Regedit” to the provided search bar and then click on the “OK” button.
Step #5. If any UAC (User Account Control) prompts, then click on the “Yes” button.
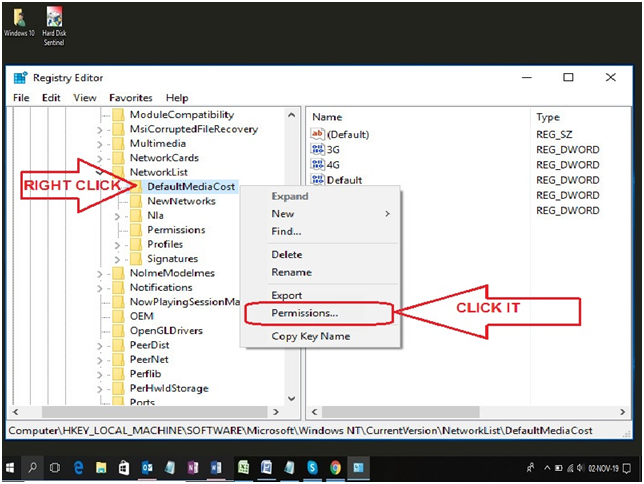
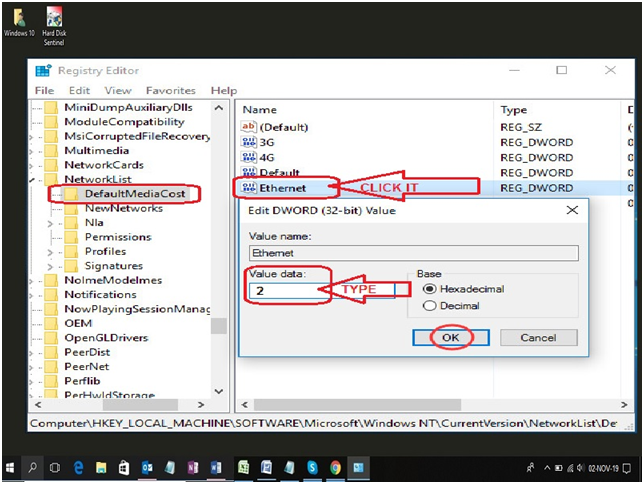
Step #6. Once your Registry Editor windows open, click on “HKEY_LOCAL_MACHINE” at the left list of the Registry editor window. Now you need to open some other tab follow “SOFTWARE > Microsoft > Windows NT > CurrentVersion > NetworkList”. In the Network list, you will see “DefaultMediaCost” right-click on it and open the permission from the option.
Step #7. Permission for DefaultMediaCost will pop up on the screen where you click on the “Add” button. Another Select User or Groups box pop-up where you type “USER NAME” and click on the “Check Names” button. Once your object name is checked, click on the “OK” button to continue the process.
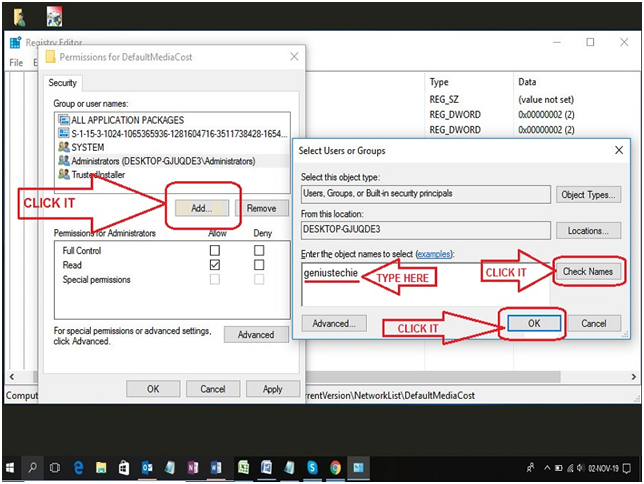
Step #8. You will see the name you add is listed in permission security Group or user names, click on it and give “full control” by tick on “Allow” and then “OK” button.
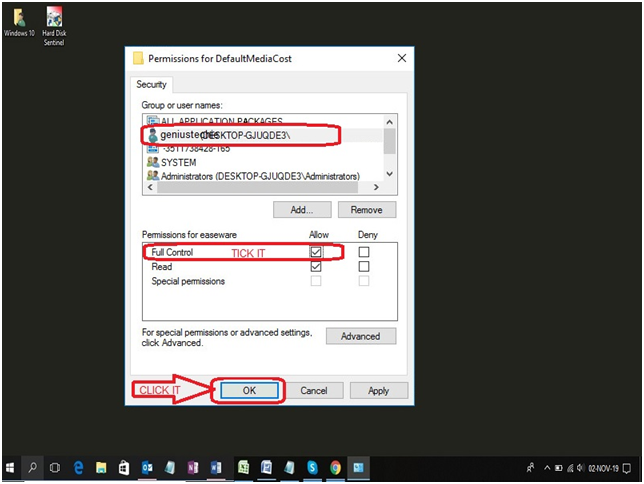
Step #9. Go back to “DefaultMediaCost” and click on “Ethernet” located at the right side of the list to set the Value data of “2”. At last, click on the “OK” button to confirm your setting and close the Regedit Editor window.
Restart your PC, and you will see that high usage of CPU is at the normal stage. It means that your Windows Modules Installer Worker is no longer causes the slow system problem.
Final Words:
If your Windows Modules Installer Worker is using high CPU processes, then the above methods is one of our best suggestions to fix the issue. Many other solutions can help you to run your windows smoothly, but when it comes to Windows 10 version, there is nothing best than the above methods. If you think that you have a better solution, then share with us through the comment box, and if the above methods help you, then share your experience with us.


